Once again we returned to Jeff's game table, in order to play out the Warr Without an Enemie rules set.
The Whalley battle scenario was still laid out on the table, though this time the Parliament would be commanded by Rob, who had run Royalists last time and my eldest son would command the Royalists, while I could handle the rules adjudication, bringing my attention to the details in action speed. Jeff was content to cat-call and ensure that photos were taken.
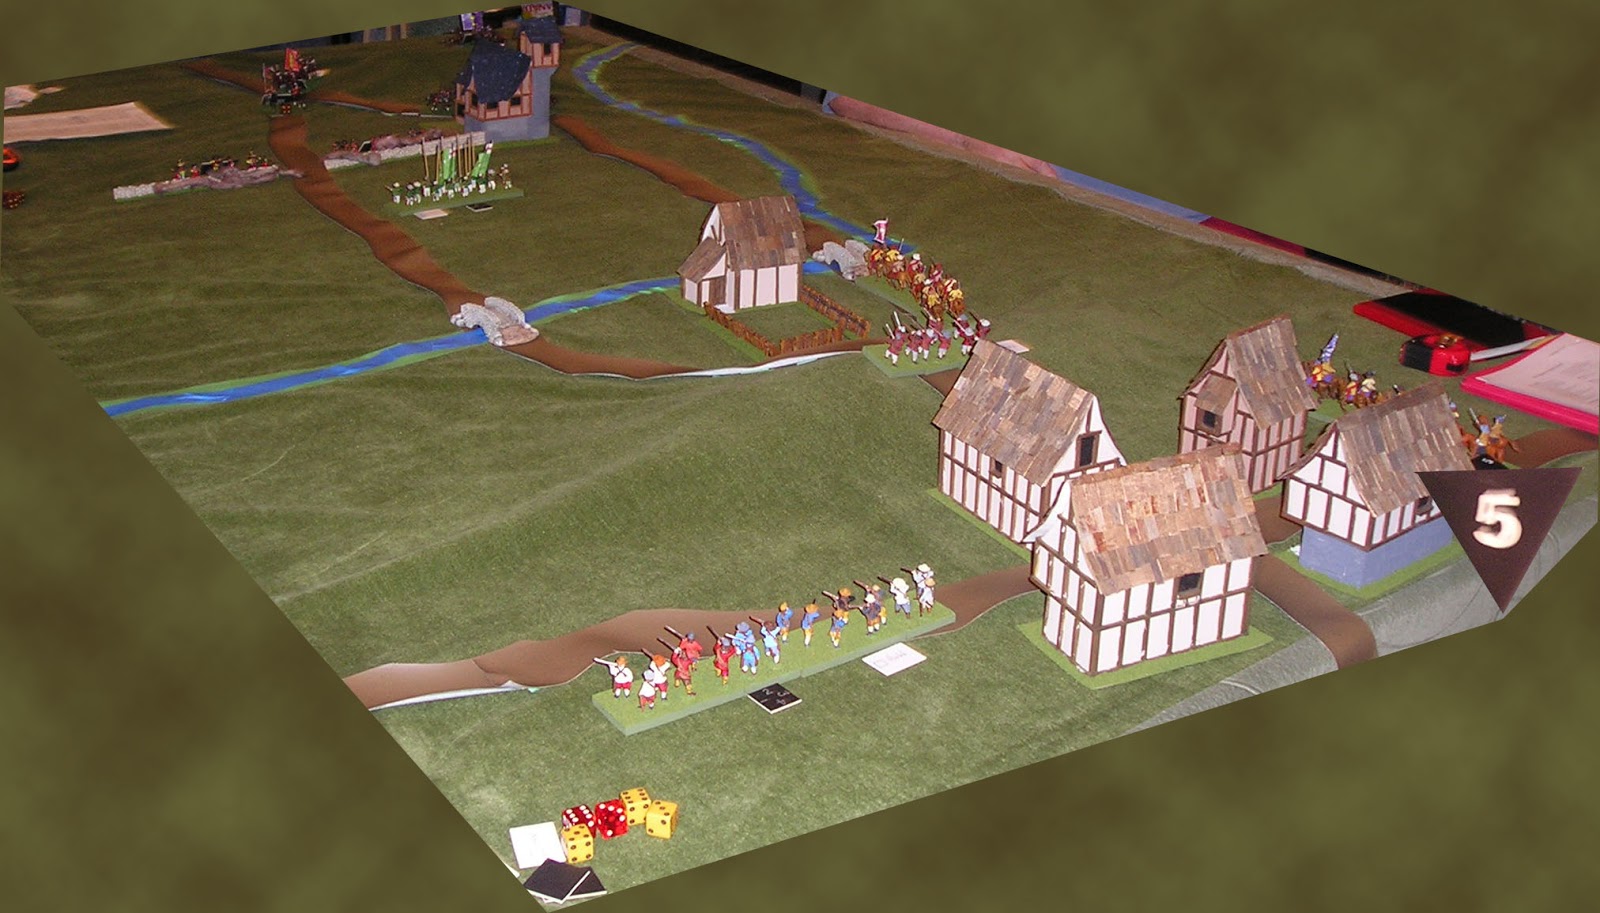
 |
| this time all the troops were 'started' on table |
 |
| again the Royalists were not orgaanized |
 |
| scattered about the town |
 |
| Colonel Shuttleworth was in nearly the same spot as first game |
 |
| and his commanded shot was also arrayed to deliver the first fire |
 |
| Royalist dragoons started dismounted as last game |
 |
| likewise, at a range of 8" the pike and shotte were lined up |
As before turn one was a blast of shot from the commanded shotte behind the wall and a hasty set-up for organizing the Royalists. This time the saving throws went slightly better.
 |
| fire from the wall, while everywhere else was a scramble to get formed up |
Turn two was also little different, as the firing from the wall continued to be devastating and the Royalist commander was hamstrung, basically only able to affect one unit.
 |
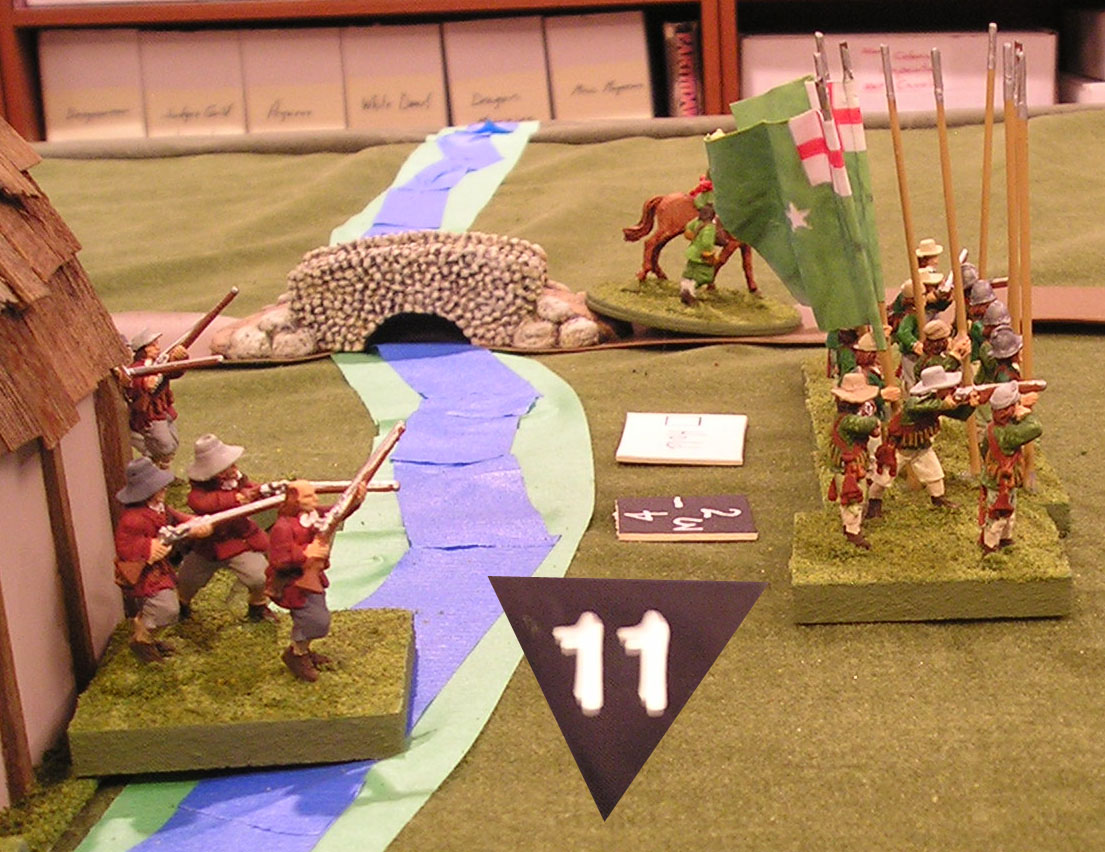
| Royalist dragoons start to fall apart as more horse rides forward |
 |
| Parliament Dragoons round the great hall in the north to face the moving Royalist horse |
Turns three and four were mostly inconsequential, the Royalist Dragoons vanished in a third blast from the commanded shot at the wall (just as in game 1) and the Royalist forces managed to struggle forward while not rolling a "2" or lower each turn for army morale.
Turn 5 is when the situation between the two games changed.
 |
| Royalists are still only starting to move forward as 1/2 of the foremost troops were eliminated |
 |
| now the dreaded "2" arrived and the Royalists started their cha-cha of retire and re-order |
 |
| the Parliamentarians under Shuttleworth, had not yet destroyed the last forward Royalist Pike & Shotte unit |
 |
| more of the cha-cha from Royalist horse |
 |
| while Parliament horse were moving to both flanks |
 |
| hurrying out across the field |
 |
| and over the hillock to the north |
 |
| the Royalist retire was short, as they did not roll a "2" or below again |
 |
| this allowed the Pike & Shotte unit to escape destruction |
 |
| scene from the Royalist rear on turn 7 |
 |
| more DPs (Disruption Points) had been accumulated by the moving Royalists |
 |
| though now they were close to reaching Parliament units |
 |
| and even getting a chance to do so without being at near exhaustion DPs |
 |
| Parliament Dragoons mounted up |
 |
| exchange of fire between Pike & Shotte and commanded shotte |
 |
| even though the Royalist forces had kept more order, they were still not all formed together, facing the Parliament troops in 1's and 2s |
 |
| Parliament commanded shotte again had rushed over the wall |
 |
| and driven back the Royalist Pike & Shotte (now with 4DPs) |
 |
| The commanded shotte was firing volley after volley |
 |
| Royalist horse was not yet in position to help the Pike & Shotte |
 |
| though now at last a gap had opened and the Parliament would have to come out to exploit their advantage |
 |
| Colonel Shuttleworth |
 |
| this time the Royalist commanded shotte was not having to cha-cha over a fence line so less DPs built up |
There were still plenty of units with DPs in the 3-4 range by the time any other Royalists even cross the river in force to help the retiring Pike & Shotte unit. After the battle my eldest son commented that the only way the Royalists can even have a chance in this battle is to hold back everyone at the river line and try to stay in the battle until that can be done. This was not his actual choice in the game though.
 |
| unable to get all the forces together the Royalists do what they can one unit at a time |
 |
| more horse storm over the bridge |
 |
| Parliament Dragoons and Pistoleers are ready ... ? |
 |
| now Royalist horse were targets of the commanded shot |
 |
| having moved to cover the retiring Pike & Shotte, stopping them from being destroyed |
 |
| Parliament Pistoleers move to engage at close range |
 |
| desperate fighting at the center field would now result |
 |
| a charge of the horse, pushed back one commanded shot |
 |
| though now that left the flank totally open to a pistoleer assault |
 |
| Dragoons dismounted and began firing into a horse column, while pistoleers moved to flank them |
 |
| not seeing the trap forming, the Royalist horse rode into a maelstrom |
 |
| Parliament Dragoons now dismounted and giving fire |
 |
| the final turn was sudden, as the collapse of the Royalists came with the destruction of their horse |
 |
| at last the foot units were coming close together, just in time to flee |
 |
| the clash of horse units was simultaneous |
 |
| all four units engaged, with the Parliament horse coming out on top of both combats |
 |
| the clubmen could see their commander, as he ordered the general retreat |
 |
| moreover, they could see why ... all the horse was dead |
 |
| Shuttleworth would hold the field |
 |
| with the Pistoleers, disrupted somewhat, though triumphant |
 |
| they each took some DPs as they passed through each other in their respective combat pursuit |
 |
| nothing more to shoot at for the Veteran commanded shotte |
 |
| Now the foot could retreat together |
 |
| still only 1 DP for these Veterans |
 |
| Shuttleworth could look up the road to see his Royalist opponent start to flee |
 |
| all the Royalist forces remaining at game end |
There are still some rules issues that are not completely clear (especially as part of the charge procedure).
And we have had some feedback from the game designers (Nick):
- Units that are on AHC, CT and AFC
orders can change their orders to Hold for free
Yes. A unit commander could
always halt and seek clarification when things looked
tricky ahead.
- to rally a retreating or
routing unit a Hold order is required.
Yes. Also remember that it is
likely that some parts of the unit will never stop -
the bases removed and DP's acquired.
- Units that are not being charged
may fire at a charging unit in phase 7 only and must
be within range at that point.
Yes. This is a compromise.
Because units usually take some time to fire full,
they usually fire 1 rank at a time, so if a unit is
firing at a quickly moving unit going into contact or
out of arc of fire will not get many shots of.
- units that fire in the stationary
fire phases cannot voluntarily move in the turn (I
don't recall if this happened but it would be easy
to forget).
At first we put 'puffs of smoke'
- cotton wool - in front of the units that fired in
the stationary fire phase for this reason. This worked
well but after a few games people just remembered,
they had got used to the ide.
- if the firing unit moved this turn
add +2 to the savings throw. This is a big one which
we didn't remember last night. This rule and the one
previous seem to contradict one another; I am not
sure how they interact. The only situation that
comes to mind is a unit that is retiring but still
in range of a target.
You don't have to be stationary
to fire, you can move and fire. But if you move and
fire you take any hits from stationary firers BEFORE
you fire and also you give the other guy the saving
roll bonus. Of course you do get the advantage of the
move you make.
- Infantry vs. Mounted modifiers;
remember last night when I wondered why there were
no postive modifiers for Cavalry when charging
Infantry? Well, there isn't but there is a lot of
negative modifiers to the charge test for infantry,
especially if they are out in the open like
Shuttleworth's foot was. I don't think we remembered
them last night otherwise those combats would have
turned out differently I think (without including
DP's , according to the chart on page 18, the
Infantry would have had a -5 to the Charge Test when
Derby's Cavalry hit them).
This reflects the nature of
combat at the time, and is also often not understood.
Cavalry could and did take on infantry frontally but
if the infantry was supported or in cover then that
was risky and likely to be costly in lives. So they
would use there mobility to go round the flanks,
possibly with the charge threat idea to pin the target
in place. Isolated infantry units out in the open were
easy meat for the cavalry.
- Savings throws are taken in Combat
as well - I am certain we forgot that. The Combats
would have gone on longer I think.
Saving rolls are a key factor in
unit quality and so are part of the combat. Combats
should be fairly decisive as a relatively small
difference will produce some kind of result.
- "Under Fire": a unit
is defined as being "Under Fire" within range of an
enemy unit/base that could fire at it. The unit does
not have had to have been fired at in this turn or
the previous turn.
Yes. The idea is that
stray fire and the threat of fire would be enough.
- changing formation
casue 2 DP's when under fire; I probably would have
lost a base or two on sunday under those
circumtances if you consider this rule in
conjunction with the one previously.
Difficult for me to say
but the idea is certainly that doing things under fire
is not a good idea if you can avoid it.
- A unit which has
fought a round of melee combat can only have DP's
removed if the commander is attached to it.
Yes. The idea is that
given the situation the commander has to actually be
there himself, he can't send an aide to do this.
- I found found the
"enfilade" rule; page 16: "Flank/Rear Target: Double
the number of hits (infantry in hedgehog formation
are always counted as being fired on from the
flank/rear)."
Yes and another reason to
watch your flanks.
We may have more in follow up and I plan to post a new Quick Reference Sheet that I have designed to highlight the charge procedures and certain rolls at all times.


.JPG)


2 comments:
Did the second playing of the scenario provide a more satisfying result?
I completely understand how playing multiple rules can lead to confusion as to which mechanism is in effect under which rules system.
Happens to all of us.
Yes actually, the second playing showed that the Royalists have nearly zero chance of winning unless they use all the possibilities within the rules and have some really good luck throughout the game.
I also found the effect of removing ego from the game was fostered by the knowledge that we would play the second game and that nothing was 'riding' on either game other than our collective better understanding of the rules system.
Post a Comment