Monday, December 27, 2010

BIG IRON

Bluebear Jeff agreed to my request to get something going on a tabletop.


I has simply expressed a desire to push lead, maybe something naval as I knew that Jeff had been reading much on things 'wet'.


So the Japanese-Russian engagement from the turn of the last century was proposed.
The Battle of the Yellow Sea


This time my eldest son got to choose where he wanted to start off, then whether he wanted me as a team mate or not.


He chose the Japanese, and set me up as the leading element.

Not knowing much of the early iron behemoth tactics, I went with a line from Nelson, "forget about all the tactics and maneuver, just go straight at em."

Then I discovered that I had better gun range than their lead ship.


Time to do a little maneuver, at least to get my better guns into range and keep their others limited.


Next time, I go slower and let them come to me ... the Russians had to get out on the one end where the Japanese already were.


Nothing like the historical, of course we did not get the zany luck of killing the lead Russian Admiral right after he gave a change course order...

Tuesday, September 21, 2010

TRULY VILE
Battle at Jeff's

Last Sunday saw a contest at Bluebear Jeff's table.

This time round was a second encounter with Victory Without Quarter rules.

The differences this time were, a storyline, complicated battlefield terrain and a time limit (of sorts as my eldest son and I could not stay on and on till a final ending).

The setup saw Vile Stagonia opposite a river (with fords) and Duchy of the North, marching in parallel lines, Jeff has the battle that this is based upon.

Essentially the Stagonians must overcome working on exterior lines of communication while the Norden troops have the advantage of interior lines of communication.

Another problem with the Stagonia situation was totally dependent on early luck, as the river fords could only be crossed at 1/2 speed, something that the movement rules run by random cards make even harder since on many turns NO ONE may get to move at times.

The Victory Without Quarter rules are a 'game' as opposed to a simulation, something that must be taken into account and I would certainly never run a tournament with them nor use them with any historical simulation players.

Here is the situation at the end of turn one, not much change from setup other than the one bit of luck for Stagonia was the entire left wing got to move (sadly only 2 units on the right - the ones that have to cross the river fords - got to move).

Turn two and more movement on the Stagonian Left Wing, so was the Norden Left Wing busy, again only 1 unit crossing a river even got to move.

The big VILE STAGONIAN MOMENT came when my son decided to first charge at (not allowed by the rules) then SHOOT AT the Duke of the North, who was just inside charge range and definitely in pistol range of his Vile Stagonian Trotters. IT was a resounding success with many hits and a failed save. BANG the Duke of the North was dead!

Needless to say the player handling him was not impressed, actually figuring the battle was over ~ not so said I and I was ready to trade him my crummy situation in a heartbeat ... he did not take me up on it. (darn)

Turn three, plenty of movement on the whole Norden line, only the Stagonian Left was moving, nothing at all from the Right wing, no cards = no move. Now the one unit that had got to move was totally out of position, alone and being shot to pieces, with no return fire allowed, in this GAME no card = no action - nothing, zip, zilch Nada.

Now at turn four I was seeing shades of Austerlitz in this battle.

And I was on the 'allied' side.

Stuck behind a river and forced to sit still for three turns while my opponent got his shooting lines set up...the battle was really over here ~ we just did not fully accept it.

I got a hit in with some great dice rolling, then it all went downhill for the Black Foote veterans I had, they wisely fell back across the river and then I decided to move the Right Wing Horse to the Left, sadly with this GAME rules what I decided means nothing since unless I get the cards to take action my units can do NOTHING, which they did for the next few turns.

The other ford was similarly totally blocked up, now with masses of infantry catching my foot working valiantly to push across. A foolish order to attack at all in my view as only 2:1 odds is useful in any attack situation, and with this GAME rules even a force at 3 or 4:1 will have trouble if their cards do not come up.

Then four turns of maneuver and finally the cannon showed up (cards not drawn means no action remember?)


My son did yeoman work alone on the Left Wing, taking and holding a hill that I told him to after Killing the Duke of the North, certainly the winner of this game. This formation that he used to move forward made me think of some proposed changes, especially in light of what masses of infantry can do to horsemen, I really think that such a double block when facing ANY horsemen should get HUGE bonuses in close combat, for the block of pikes would be everywhere here and NO CAVALRYMAN would ever charge into such a mass of men with no clear way past them. Yet in these rules only the lead unit must or gets to fight with NO bonus for the MASS of so many more men RIGHT THERE!

Once again I remind myself, this is a GAME and not a simulation.

Over at the river ford, the death toll mounted, again all I could do was watch as none of my cards came up here.

Turn ten, game si essentially over as the VILE STAGONIANS have managed to get at least half of their army killed at this point.

Odd dice rolls make our host shake his head, though the contest was not in any more doubt since turn 4.

Turn 12, too little too late.

At long last I get some cavalry move cards (the others are gone from the deck now), it was a futile move, mostly to permit my son to finish enjoying the day.

I'll wrap it up here with some more minis eye candy.


Next time a simulation, if the demand is for a cards game, I'll choose poker.

Monday, June 14, 2010

PROXY BATTLE
After Action Report

My son Victor and I filled out the troops and laid out a map on the tabletop


Our instructions were: one collision will be Rudelheim militia and dragoons running into Highlander mercs and fusiliers and Hussars (Frankszonia under Broderick Woad) in open but rolling terrain.


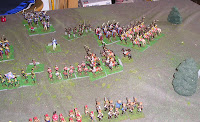
Here we see the first major action on the tabletop, the mercenary Highlanders and fusiliers have advanced while the Dragoons have moved to engage their opposing Hussars.


Here we see a closer image of the lines of Infantry set-up in opposition...the Militia men have spread out their ranks to cover the larger numbers of mercenaries.


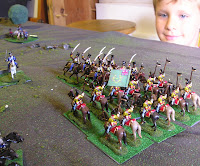
A close-up of the first cavalry tangles that would erupt on the Militia right wing.

This cavalry tangle-brawl carried on for three rounds. Then the Dragoons overrun the Hussars, pressing on into the flank of some Fusiliers (shattering them and taking their colors) and carrying on into the flank of the Highlanders (who did not make it into square!); who kept their cool and drove off the Dragoons.


Here we see the foot lines exchanging fire, with the Highlanders now in Square.


Meanwhile the Dragoons were triumphant over yet another formation of Hussars, Victor looks on with interest.


With Turn 7 (perhaps 2 hours & 20 minutes simulated) the tipping point was fast approaching. Half of the Dragoons and 1/3rd of the Militia were either destroyed or fled the battle. On the Mercenary side the Hussars were all badly mauled, one fusilier unit was utterly shattered the others were all suffering casualties in the continued musketry exchange with the militia. Only the Highlanders were relatively unscathed, though forced to maintain their square due to the presence of the greater half of the Dragoons.


The tip came with a blast from one of the wounded militia formations, shattering the morale of the remaining fusiliers ~ the retreat was on, the Highlander Mercenary infantry brigadier was unable to stem the tide.


Proudly showing their captured fusilier colors taken as a prize the triumphant Dragoons began cheering as they watched the mercenary lines dissolve...


Facing defeat, the mercenary commander must now recoil without becoming enveloped by the Dragoons, with all his Hussars fleeing the field the Highlanders may have to walk out in square until dark...


As can be seen here at the end of the day's battle, the mercenary infantry could easily be pinned and forced to surrender utterly.

Thus is the pain of fighting in the open when your cavalry cover is gone.

Monday, May 31, 2010

PAINT DAY

A wonderful evening of brushwork's was shared with Bluebear Jeff.


I worked on some Napoleonic Austrian foot and four 1/900 scale Portsmouth Miniature sailing ships.

They were all primed and dark undercoated, the evening was spent in quiet conversation on topics ranging from Emperor vs. Elector Blog items of interest ~ the Frankzonia proxy battle ~ to historical tidbits, such as the pre-dreadnought ships and plans of Jeff.


Jeff's work concentrated on some tricorne foot for Bearstein and conversion of some more xmas buildings for tabletop use.

All in all both an entertaining and productive evening.


The ship finished product looks great with all the sails!

Tuesday, May 04, 2010

Little Table Top

My youngest son, Marcus, was excited to learn that on May 2 we were to play out a game that he could control the troops for.

I set up a simple little skirmish on the kitchen table.

Some red coats and some blue coats.

Marcus liked the blue ones.

After a few musket exchanges, where Marcus got to roll lots and lots of dices, we came to an encounter with the cavalry and a 'square' of red coats.

The blue riders did not fare so well, the red coats did loose one unit also.

After sneaking around the trees (and having the house move?!?) the 'green jackets' sent off one more of the blue coat men. Marcus turned his final unit and blasted the 'green jackets' out from the trees and won the game!
Fast Tabletop Action

My son Alexander really wanted me to run a game on the first afternoon I got back after a biz trip away for 4 days.

So I decided to set my time to the boys (his younger brothers wanted to watch) for the afternoon after getting home like that.

So a fast SHAKO game got put on the tabletop.

Alex wanted the redcoats vs French.

We set it in Spain in 1813.

Rolling for terrain we got lots of 'rough ground'

The troops were simple, one foot gun with a light and heavy foot for the British and a force of light cavalry. For the French some hussars a pair of horse guns and a light and heavy foot force.


Alex set his men into a mass on his left and Horse to his right, with the Gun on the tall hill in the center ~ set to dominate the field!

I had set the French into defensive formation, with the horse on the left (the only open ground) and the light infantry to support them.

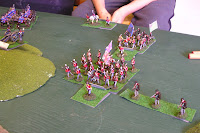
The action took a couple of turns to get into the main thrust, Alex's guns were not able to get any hits and he chose to move the Horse forward, putting them into the range of the French horse gun on the flank. Then the horse formations together clashed, here we see that the French Hussars have withdrawn from the first encounter and were rallying to come back again.

Here we see the field at the moment the British commander chose to fall back ... their horse were defeated, first a salvo of artillery broke their morale, then the French Hussars charged into them ... sowing great confusion and sending the unit from the field.