A wonderful day of English Civil War battle at the fictional Battle of Bollingborough July 21, 1643
We used the Forest Wyre Wargames Club "Warr Without An Enemie" rules set.
This was a first time for this era of historical game for McLean, our host at The War Dungeon, and it led to a most memorable experience for him:
 |
| more about what brought this about in the after action report |
Having the most experience with the set and a total of 5 of us present I took on the role of game controller/referee and set the players loose in organizing their commands.
I used a random terrain selection, before the match, to set up the terrain, from
Tinker Fox: by the Perfect Captain.
Then using a discussion item from a blog (whose name I cannot recall right now), I set up the reconnaissance for the two armies, that sets up the deployment 'options'.
Roll 1d6 for each cavalry brigade in the army. Roll 1d6 for each dragoon unit in the army.
Compare rolls:
equal = flip a coin for which side has the deployment line, neither gets to have choice; have each side write up their 'march order' in column and have them deploy in the marching positions (in the column formations) as they would approach the field of battle (easy way to do this is to have either both forces marching parallel or towards each other - unseen until the 'moment' of battle).
out score opponent, but not by double or more = the winner gets to choose the side they deploy on, so the other side must deploy on the other side
out score opponent, by at least double, not more than triple = the winner gets to choose the side they deploy on, so the other side must deploy on the other side, the loser must name their column of march and deploy in that column of march, then then winner gets to deploy their brigades (march direction does not matter as they have won the information battle), after seeing the side deploy that was outscored.
out score opponent, by at least triple, not more than four-fold = the winner gets to choose the side they deploy on, so the other side must deploy on the other side; loser names their column of march and must deploy ONLY THE first two brigades or half, whichever is larger. The remaining forces are deemed to be 'marching' to the site of battle (name the road or axis of approach). Winner of the information die roll, may then deploy brigades as they wish after seeing the deployment that was outscored.
out score opponent, by at least four-fold or more = the winner gets to choose the side they deploy on, so the other side must deploy on the other side; loser names their column of march and must deploy ONLY THE first two
brigades or half, whichever is larger. The remaining forces are deemed
to be 'marching' to the site of battle (name the road or axis of
approach). Winner may then choose a cavalry brigade -or- dragoon unit that is in 'pursuit' mode and that unit may deploy up to 2/3 distance from the winner base line on a flank position. Winner of the information die roll, may then deploy brigades
as they wish after seeing the deployment that was outscored.
The idea here is to have better strategic respect for the dragoon units of the army, there were relatively few of them as they did not have a big role on the battlefield, but a larger one in any army strategically. Obviously a foot only army with no horse units at all was totally vulnerable at all times to being surrounded and cut of or cut apart by an enemy army that only needed a single unit of dragoons to be able to run circles round them.
Anyway, onto the game. The Royalists were beaten by 2:1 in this information die roll and so had to deploy in their march column, while the Parliament was able to set up a 'limited' ambush.
 |
| Parliament to the right and Royalist to the left in their column |
 |
| General Wade at the rear of his column, likely having just returned from his own examination of the ground which his cannon had covered |
 |
| The Parliament force included a huge 4 regiment brigade of London Trained Bands (our first use of them in this rule set) |
 |
| Horse at the rear of the Parliament column |
 |
| Foot in the center, with some mixed Northerners horse, foot and a gun in the vanguard of the column. For my own part I see this column as marching out from a town, likely south of Oxford, and using the Northerners as a 'meat shield' for the more experienced and valuable Oxford foot and horse. |
 |
| Parliament had their horse brigade in the center of the formation |
 |
| with a smaller force of Essex foot and a light gun to their far right flank |
 |
| breaking out from the road and their hiding positions the Parliament forces dashed to better fighting positions and over the large hill that separated the two armies. |
 |
| an alternate view of the deployment |
Turn one was somewhat longer than needed as folks were figuring out what each 'phase' meant as some call for movements which are carry-over from earlier turns - of which there had been none.
 |
| more maneuver over the hill for Parliament an positioning for the Royalists to face the oncoming forces |
 |
| the big horse lines of the Royalists were delayed shuffling around a wooded area |
 |
| the large London Trained Band lines stood out on the Parliamentary left |
 |
| Parliament General was rated poor and cowardly (meaning that attaching him was a waste of time) |
 |
| While the Royalist General Wade was a Good and Inspirational commander (attaching causes double bonuses) |
 |
| London Trained Bands |
 |
| More of the LTB |
 |
| For turn 3 the advancing Parliament horse deployed into lines of battle |
 |
| and on the right set up fields of fire |
 |
| while the Royalist vanguard was slogging through small woods |
 |
| Parliament foot lined up to have interlocking fields of fire |
 |
| Royalist cannon were dragged through the edge of a forest and up the hill to get into a deployment position with cover |
 |
| Parliament horse deploy |
 |
| Royalists make ready |
 |
| the lines had formed up for battle now |
 |
| Turn four saw the action heat up as dragoons deploy into fighting line at the top of the hill and the horse units test each other, with Royalists being driven off by London Trained Band firing at close range standing up to a charge! |
 |
| dragoons fire |
 |
| LTB fire |
 |
| exchange of fire in the center, dragoons vs pike&shot |
 |
| the Parliament light gun in action (it may have caused a disruption point?) |
 |
| Royalist Norther horse, were to get itchy saddles and ride out from any supports |
 |
| the Parliament line, dragoons (left of image) to LTB (right of image) |
 |
| far on the right of the Parliament line were some regular foot, pike & shot, that held the village and the access road for Parliament |
 |
| Northern foot pushing towards the Royalist left flank, slowed and disrupted by some woods |
 |
| now the battle was fully joined with both Royalist and Parliament horse battling for the hill top |
 |
| view of the center from the Parliament left |
 |
| General Wade was to have his first wound of the day in this cavalry clash |
 |
| Parliament horse tried to charge home through the dragoons ... sadly rolling too low |
 |
| Northern brigade of Royalists continued to push forward |
 |
| some great extra scenery from Rob |
 |
| The Royalist center took the fire from the dragoons apace |
 |
| though some units did not stand so well (DP marker at 5) |
 |
| Parliament horse on the hill top |
 |
| and beyond |
 |
| Essex foot brigade and artillery (of the Poor army commander) continued to fire the ordnance into the oncoming Royalist Northerners |
 |
| Royalist baggage train, models by Rob |
 |
| the Royalist horse had caused much mayhem on the hill top, the dragoons had voluntarily routed to flee the horsemen rather than be run over via the flank |
 |
| LTB now made its large regiments presence felt via more shots |
 |
| though the top of the hill was still 'held' by Parliament |
 |
| while the forward squadrons were going to face a tough fight with Royalist Pike & Shot |
Turn six ended with the first required die roll by Parliament for army morale, not a tough one as only a 3 or 4 on 3d6 would have caused any troubles.
 |
| now the positions did not look so favorable for either side, as the Royalist horse looked to take advantage of the raw London trained bands |
 |
| while the hill would see tough fighting for the Royalist center |
 |
| while the far right of Parliament was to now have a very clear set of targets caught in a three way crossfire between artillery and pike & shot |
 |
| moreover General Wade was now injured |
 |
| though horsemen of both sides charged past each other, seeking to break the lines of men protecting each of their baggage trains |
 |
| Royalist cannon fired! |
 |
| royalist foot driven back, though not with losses |
 |
| holding the far right the Parliament commander made sure to keep up fire on the Northern units still remaining after the horse were wrecked. |
 |
| the London trained bands, did not stand so well this time as they were forced to retire in melee |
 |
| one LTB did get into a hedgehog |
 |
| the damage to the Royalist horse did cause them to slow their follow up attack ... (Rob in the background setting up his own shot) |
 |
| General Tyndall was the Parliament commander, and while useful as a General and perhaps an administrator, he was of no value in battlefield command. (rated poor cowardly) |
The end of the turn was to see a set of die rolls now with Parliament needing to roll more than 6 and Royalists more than 5. They both passed.
I missed photos in turn 8, mostly because I was helping to explain the meaning of the missed morale role to the Royalist command.
The rolls for the end of turn 8 were more than 7 for Parliament (they did that on a 3d6), and for Royalists, they rolled a 6 total on 3d6. This meant for a conversion to retire for all units and rout for any that were already in retire ... this caused the Royalist horse charges to all halt and start retrograde motions.
 |
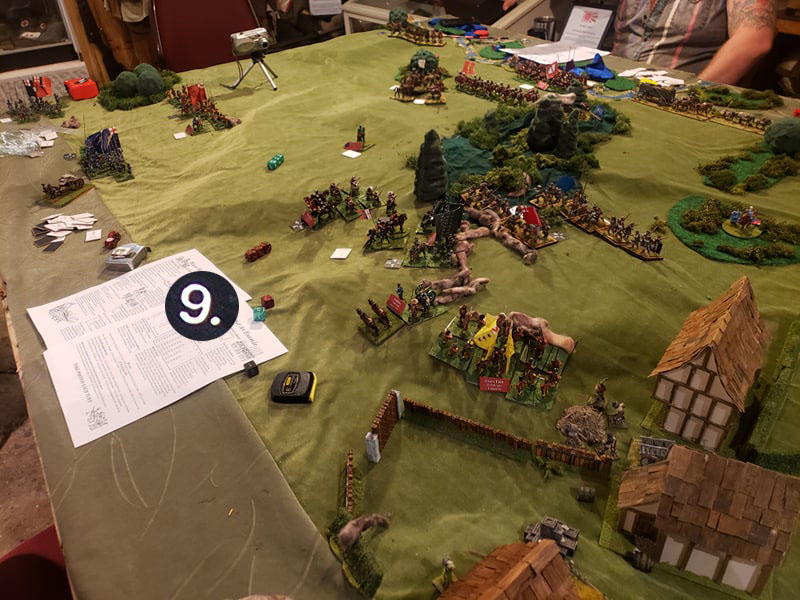
| The start of turn 9 as the LTB was disrupted, but just barely still in action, while the Royalists were scattered about, with a badly wounded commanding general and the general of the Royalist center foot brigade also now wounded |
 |
| the firefight on the village flank was intense with the Royalists now retiring from the fight, giving ground and taking more fire from the Parliamentary artillery |
 |
| General Wade was so injured he could not move to join an attack |
 |
| nor did he have CPs to spare to help his mostly disrupted units (the 5) |
 |
| while the Parliament still controlled the hill |
 |
| the routed dragoons had only now emerged from the forest and were finally getting settled under control (three turns) |
 |
| while one unit of the LTB had fled the field, at least 1/4 of the brigade was still holding its ground! |
This was the supreme moment.
End of turn nine army morale rolls:
Parliament needed a 6 or more on 3d6, this they achieved.
Royalists needed a 7 or more ... this was the roll:
 |
| McLean rolled the dreaded three-eyed-raven |
This was a game ending moment, as it was half or less than the total points of 7 and that causes the immediate rout of the army. Game end.
 |
| overall positions at game end |
 |
| another player's shot |
 |
| General Wade used his last CPs to join his horse, though they held the line in their last fight with Parliament horse |
 |
| Northern brigade was holding ground at the end |
 |
| while General Tyndall did not loose the battle, one could not really say he 'won' it either |
 |
| it was the Parliament horsemen, tenaciously attacking that drove the Royalists to their starting line |
Many of the pictures come out with a yellowing of the images due to the lower light levels in the War Dungeon. I brought along my 'sky cloth' and put it to use in these final images from the table.
Finally I also took a couple of pictures of the feature display of McLean's grandfather's uniforms from his time in the RCAF in WWII
Again another great game day at The War Dungeon.
Looking forward to some more ACW coming up in August.


.JPG)


