Showing posts with label Napoleon's Battles by Avalon Hill. Show all posts

Tuesday, November 26, 2024

A 'throw-down' Napoleon's Battles match-up

 The aim was to get 8-12 players into action in a 15mm Napoleon's Battles tabletop battle.

The actual numbers of players to arrive would determine the troops on the table.

We ended up starting with 9
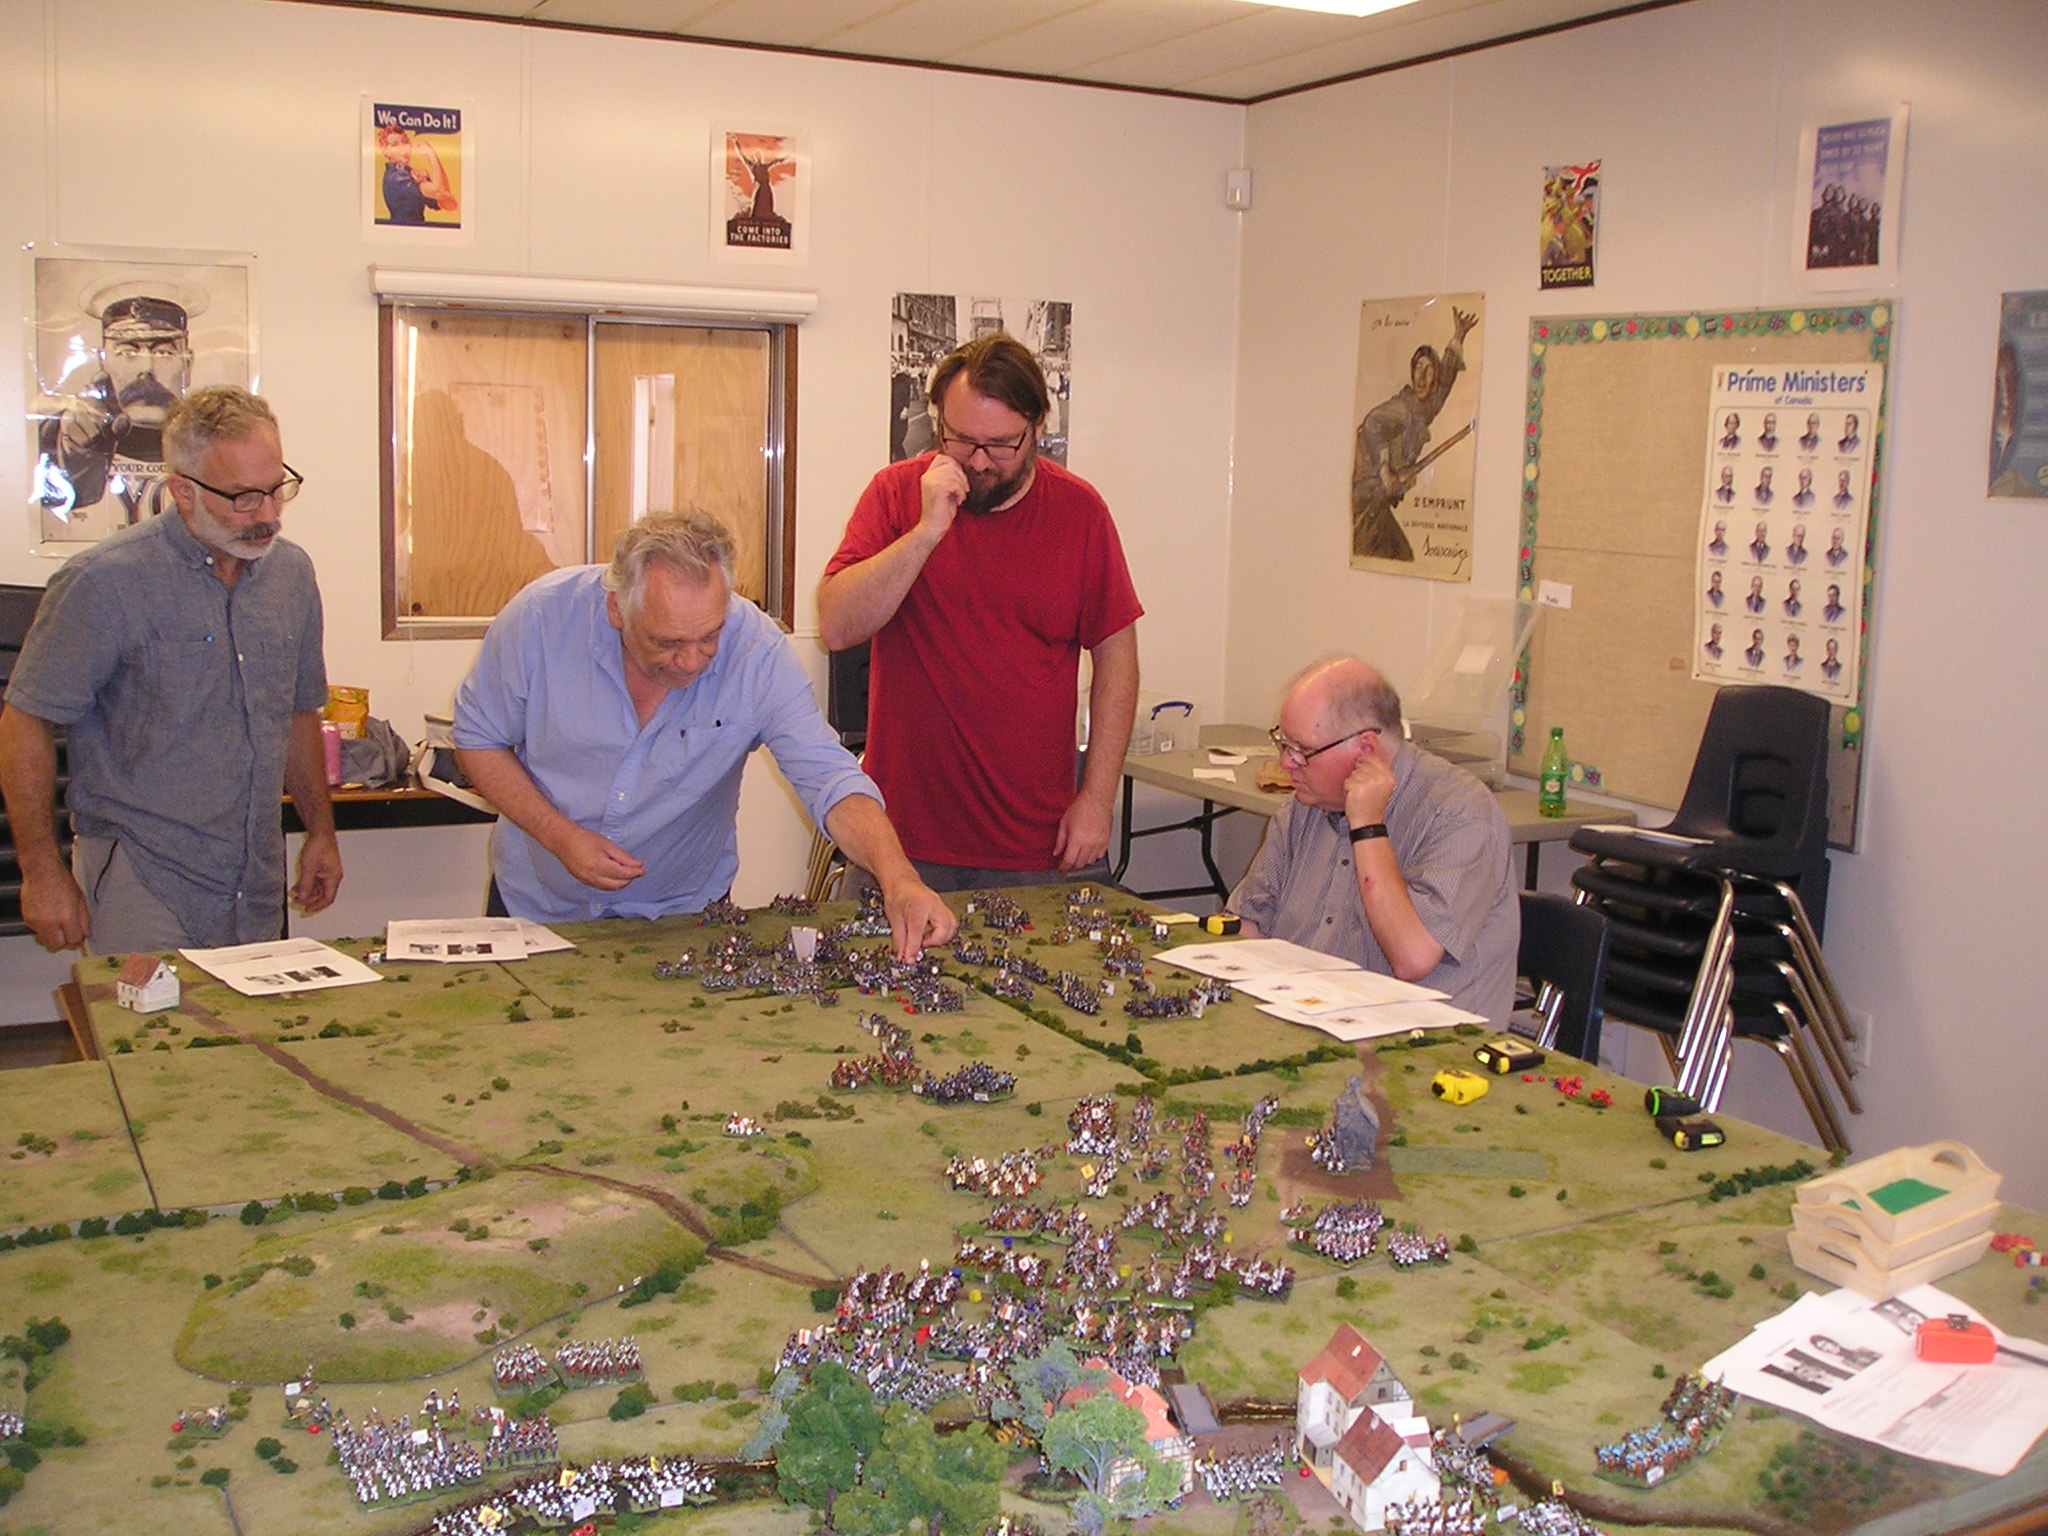

setting up troops

I was able to take on troops painted and prepared by Nate, and we got to be on the same side and actually work towards a goal together.  Something new, since we are often having to teach from opposing sides.


board laying out the troops available and
the ones selected and a time-track

We gathered at the University of Victoria on Nov 24, I had the added job to deliver special performance attire for my youngest son, who is now a student at UVic.


my youngest son did not take on any command when we were
arranging troops ... he did come in on turn 5

the whole French force (seen from the right flank)
Bavarian in the foreground
then French Heavy Cavalry
French Corps with Baden troops
French Corps with Wurttemberg troops

Russians on their left

Russians and Prussians in the center

Prussians on the right

it took a couple of turns to get out from the restricted
area that the French were forced to deploy from
though we managed to do three turns in 45 mins

combat was more of a 'hold back' as the French right and
center were taunting the Russians to come out into open ground

Then my son came back the the game room and decided to jump in - now there were 5 commands on each side.

table action became hot and heavy
-seen here-
Russio-Prussian forces moving during turn 5


turn 5 became pivotal as there were firefights and melees across the line


turn 6 was massive on the French left (where Nate and I were)


while over on the French right a stalemate had developed

the aftermath of a huge light cavalry strike
3 artillery batteries destroyed two formations
of Infantry routed along with the gun crews
the entire Prussian corps on the flank was either
routing or disordered

seen in the foreground here are the horses
of France, now disordered and damaged (though only
from slowing down to brutally saber and rout
the Prussians)
in the mid section are the location of the three batteries
that were destroyed in the charge

It was so nice to finally have a charge work for me.  The mixed corps are often a challenge to operate in the battlefield environment and I have been premature in my operations in the past.  Not so this time.

Patience worked and the wounded formations of troops were no match for the charging horsemen.


more of the players Russio-Prussian forces

view at the end, on the French left
a marginal French victory


view thru the center and French right
center was a marginal allied victory
far right was a draw

Russio-Prussians managed to also wreck three
French batteries and rout/disperse the Bavarian corps

The overall victory might go to the French, given that the French side still had three of the five unused re-roll markers and the Russian Pavlov grenadiers had been routed.

Great game everyone!


Saturday, September 07, 2024

Wagram Completion

 On Sunday August 25, 2024 the Nanaimo Historical Wargamers put on the third day of a WAGRAM game.


Nate had the hosting location, Rob did up some fantastic terrain, and there were miniatures from at least four collections brought together to mount this huge battle.

I arrived to the battle in full swing:


I shot this just as the lights came on.

I'm getting ahead of myself though ... I have already shared some of the data from the Friday and Saturday game sessions ... I was surprised to learn that on Friday just after I had some little chats about the setup, there was a FIRE ALARM!


this photo was sent to me likely only moments before the alarms sounded

This messed up the first night game action ...

Saturday was more sedate, with loads of movement from the French arriving.

They drove towards Aderklaa, which became the site of breaking the Austrian line.

Now I arrive seeing that Aderklaa was broken, the west wing of the Austrian army was going to be isolated and defeated in detail ... Bonaparte only had to decide if he would press hard on Deutches-Wagram or not ...

the model on the table representing Bonaparte

Seeing that the major battle was lost, I was determined to at least make a good show of the left flank and 'hem in' the French or maybe even make a dash for the bridgehead - even if only for the political value of having a squadron or two of Austrian cavalry show up in Vienna and send a shitty message to Paris.


Some good shots of the gaming crew, there were two of us added to the Austrian command, it appeared as though these two players doing Bonaparte and Charles had run a game of Aspern-Essling more than a decade ago, and this was the culmination of their plans to have a go at the second half of the 1809 campaign battles.

Enough chit chat, now the time-lapse of my part of the battle:


So I was on the Austrian left (east flank) and was given over command of much of the reserve heavy horse ... and its 6 horse batteries!

I was determined to push this force to the far left and use the guns to hurt Davout as much as possible while also screening for the 'eventual' arrival of Archduke John.

Sadly John would not arrive in time to do anything much (just like in history) and the commands I had were not of the A list category, indeed the heavy horse commander was a 4 rating with 4" range, I had failed at least once during the game to move him.

Beyond that "Charles" decided to countermand my orders and had me push all forces across the river into the face of the French - including a heavy cavalry force that could not reach its target in one move.

It was to be a suicide.

At least we had a few laughs.

I'll dump a few more other photos, then comment on the amazing terrain done by Rob.


Archduke John

Napoleon

Davout

panorama of the battlefield from the north, Austrian, side

Rob did a great job wit the terrain, as I have shared in a couple of earlier posts, here also is the custom storage system that he built to bring the terrain to the game location.


See more photos and commentary about the game HERE at Codstickers Historicals

 After the cleanup, there was some discussion about doing some more 'campaign' like events, where I suggested having a multi-column game setup similar to the ones I did back in 2020.

Mini-Campaign

Saturday, August 24, 2024

Friday, August 23, 2024

Wagram game started

 I shall not be able to attend until the Sunday, tonight, Friday 23 August 2024, the game table was set up and the first moves begun.


Early data I have from the battlefield indicates that the game is starting with the French crossings completed and the 5-6 July 1809 being the time of the action depicted on the tabletop.

I might get some more images to share on Saturday, then get into action Sunday.

Saturday, August 22, 2020

Long Live Magnetics!

Magnetic Miniatures System


 For some time now I have been sharing my older posts (2013 and 2007) about my magnetic miniatures system.

I have made changes in how I am using them in the past year and thought it was a good time to review and update.


Feedback is welcomed!

Saturday, May 26, 2018

Battle of the three Emperors - AUSTERLITZ

It was a joy to be able to bring to the table and make use of the miniature collection of Kelly Jones in the Austerlitz scenario that Kelly and I had designed in 2004.

The crew of players for the battlefield May 20, 2018

A total of seven players were assembled, with five to take on the Russo-Austrian Allied commands and my son Alex to team up with me to run the Soult and Davout 1-2 punch on the French right wing.

Overview of the table, from the south end, Castle Sokolnitz seen on the left ... Pratzen plateau on the right

the morning fog of December 2, 1805 was simulated with the batting stuffing laid out in irregular shapes

The only exposed French formations were ringing the western highlands

Pratzen plateau was loaded with Russians

The grand scale gets to be better seen when the players hands show the size of the 15mm miniatures

The turns all started with a 'burn off' die roll for the morning fog 'lifting' which - when present would only allow 6" visibility and any combat would suffer from 'blunder combat' penalties


The fog burned off faster than in the first run of this game in 2004, such that by 09h00 the south half of the valley was visible.

now the south half of the field was visible, Telnitz seen at the bottom of the image - to the left bottom are the arriving columns of Davout and III Corps

The nasty French 'surprise'!  Davout and III Corps arrive in the south to put up a fight for Telnitz and Sokolnitz

Russian columns were not deterred

the batting used for fog had clung to the French eagle on this command cadre stand making for an interesting image

different angle on the troops holding the river line
Now the shooting started by 10h00 the fog was almost completely gone.

Only a small corridor of fog remained on the north end of the field, while around Telnitz there were raging fights and the Russians had attempted a storming of Sokolnitz!

View looking south along the center of the Allied lines


A hole had opened in the center of the Allied lines ... leading directly to the unprotected Headquarters of Tsar Alexander and Emperor Francis.  A French cavalry force did not miss this golden opportunity!

More Allied cavalry was in trouble in the south as the independent Dragoons strike deep out from French lines

the field center, with the huge hole open for the French cavalry assault on Allied HQ

Russian columns had crossed the Goldbach north of Castle Sokolnitz and were preparing to prevent any interference with their further assault of the fortification (which had briefly been set on fire)

Allied center of field formations with Russians leading and Austrians to the rear.

French Cavalry strike out from north of Kobelnitz into Russians advancing from Pratzen

Russian formations in disarray after failing to penetrate Sokolnitz

French Cavalry hammer into the Allied advance guard making ready guns to fire

Russian cavalry in rout condition is overrun by French cavalry on the extreme south end of the field
A lull comes over the Allied half of the field as the news that Tsar Alexander and the Austrian Emperor had last been seen to have been OVERRUN by French Cavalry.  No one knew where any of the senior Allied commanders were!  A novice Russian officer one Brigadier Meatballatov was going to have to take charge.

the control board at 10h30, score Allies:0 :: French: 6
By 11h00 Meatballatov was now attempting to get a handle on what was going on with the Allied situation.

Tsar's 'tag' and some measuring devices (in clear plastic) for maneuver and artllery

French (bottom) face Russians (top) on the north flank of the battlefield

French Lines at second level of north hills in the foreground, Pratzen and the Stare Vinorady (yellow and red lichen) in the distance
I was informed later in this stage of the game that during the 10h00 move for the Allies a Russian commander failed to make his command roll and the whole Russian Infantry formation did not move, this put them behind the others and effectively blocked the faster moving Austrian columns that were set to come onto the table that turn and following turn.


Marshal Bernadotte's I Corps moves to the far north (left) of the French lines.  The battle in the north is finished at this point - yet the Allies just cannot fathom that their plans are going so badly ...
With 11h30 Kutuzov was to take back command of the Allied efforts, having been found and brought to the remains of the Allied HQ.

Field at 11h30, all the fog is gone and now the desperate situation for the Allies was being made clear

Russians were forced to make squares behind their attacking forces at Sokolnitz as French cavalry were marauding all over the region

Kobelnitz was another garrisoned town that would be a problem for Allied attack

The north of the field had barely been dented by the Allied attacks and now they were reaching a 'fatigue' number value

Not getting it all their own way though some French formations, mainly of Lannes V Corps were taking casualties

The massive 5' by 9' table comes into better view when seen with the Allied players making moves

reaching a full 2+ feet across the table starts to become a challenge as the Allied advance grinds forward

We then had a delay as a few players were going to have to depart.

So some awards were in order:

MOST COSSACK and 3rd Place Allied

2nd Place Allied

First 1st Place Allied

Most likely to be captured officer!  (He was the Tsar!)

We then resumed to finish off the tale for the day.

French Cavalry continued to linger in the Allied rear, seen here at the south end of Pratzen

Austrian Cavalry were making ready to sweep the south clear, when the Fatigue levels of the nearby left wing simply collapsed, this cavalry would be called upon to keep the French from any effective pursuit

Russian formations routing and falling back near the Allied HQ (center left of image white horse)

The struggle at Puntowitz as Allied artillery were in position to damage the French they would not be able to keep their positions as the right and left wings on either side of them were melting away due to fatigue

French with Lapanz Markt behind them

Jirschikowitz now garrisoned by Russian Guardsmen, who would have to be sacrificed in a rear guard action as the left and right wings were hitting fatigue levels and withdrawing

Bridge on the post road to Brun, now totally controlled by French forces

Bernadotte and Lannes were ready to sweep the Post road clear and Bagration would have to withdraw having now reached the fatigue number for his formations

marker board final tally, Allies: 3 :: French:10 (with perhaps 12 more in disorder) as the listed units are the removed ones from the table.

Final result was without a doubt a French Victory.

Special thanks to Nate Stevenson, coach and history teacher at NDSS for arranging the use of the portable classroom spaces.

Epilogue, the Allied plans:

This was the general plan of the Allies as constructed from historical sources.
The changes that the Tsar player had made were to move the Guard up earlier and thus cut off the 2nd column of Bagration to arrive later than originally (I think this worked to the Allies favor in the end as they were able to keep the French from using Murat as a total executioner of the whole of the left wing of the Allied army as happened historically and I (as Murat) could not get out into the open ground because these formations were 'behind' where they would have been historically.

The other change to the plan was to make Lichtenstien an independent command that would have freedom to 'react' to the field situation as he saw fit.  This put the last arriving reserves commander into the great position of being really able to save the day for the Pratzen plateau as that was the right place to move, again not at all like he historically arrived coming in along the congested Post Road from Olmutz and getting tangled up with the retreating and routing elements of Bagration's command.

GREAT DAY EVERYONE THANK YOU!