TWO CAMPAIGN BATTLES IN TWO MONTHS!
Given that we started this Campaign series in 2019, then got one game in each of the first two years, this pace now feels more like action.
Last Sunday, 25 July 2021, the Battle of Freezing Hill - prelude to Landsdowne Hill battle, Waller having occupied Landsdowne Hill, Hopton now must maneuver his army to another nearby hill, the battle here is the Royalist rearguard being harassed by a Parliamentary probing force.
 |
| a map of the deployment based on the one from our campaign book |
I had some time to lay out the battlefield before my Royalist opponent arrived. Then time to take a few pictures.
 |
| the 'farm' on the north west side |
 |
| a little copse of woods in the north east |
 |
| this copse of woods would become a thorn in the Royalists side ... |
 |
| woods, lane and hedges that were to be occupied by Parliamentary Dragoons |
 |
| the quiet field ... no troops yet |
Rob did arrive and along with the troops we used his much more expressive hedges.
 |
| now filled with the troops of both sides Parliament to the left, Royalists to the right in this image |
 |
| Royalist right wing |
 |
| Parliament left center |
 |
| Parliament Dragoons, Sommerset Dragoons in Green Waller's in buff |
 |
| Royalist command and center |
 |
| Royalist left and center (little copse of woods behind the Royalist line) |
At this point we had just started to do some command rolls when the power went out in our area.
Good thing this was not a broadcast game as I could do nothing about the power outage - it was only in our little neighborhood between two streams.
We then moved the table out under the tent and resumed action with better lighting for photos, just a bit warmer than the shaded and cooled garage.
 |
| overall field at start of turn 2 |
 |
| Royalist center |
 |
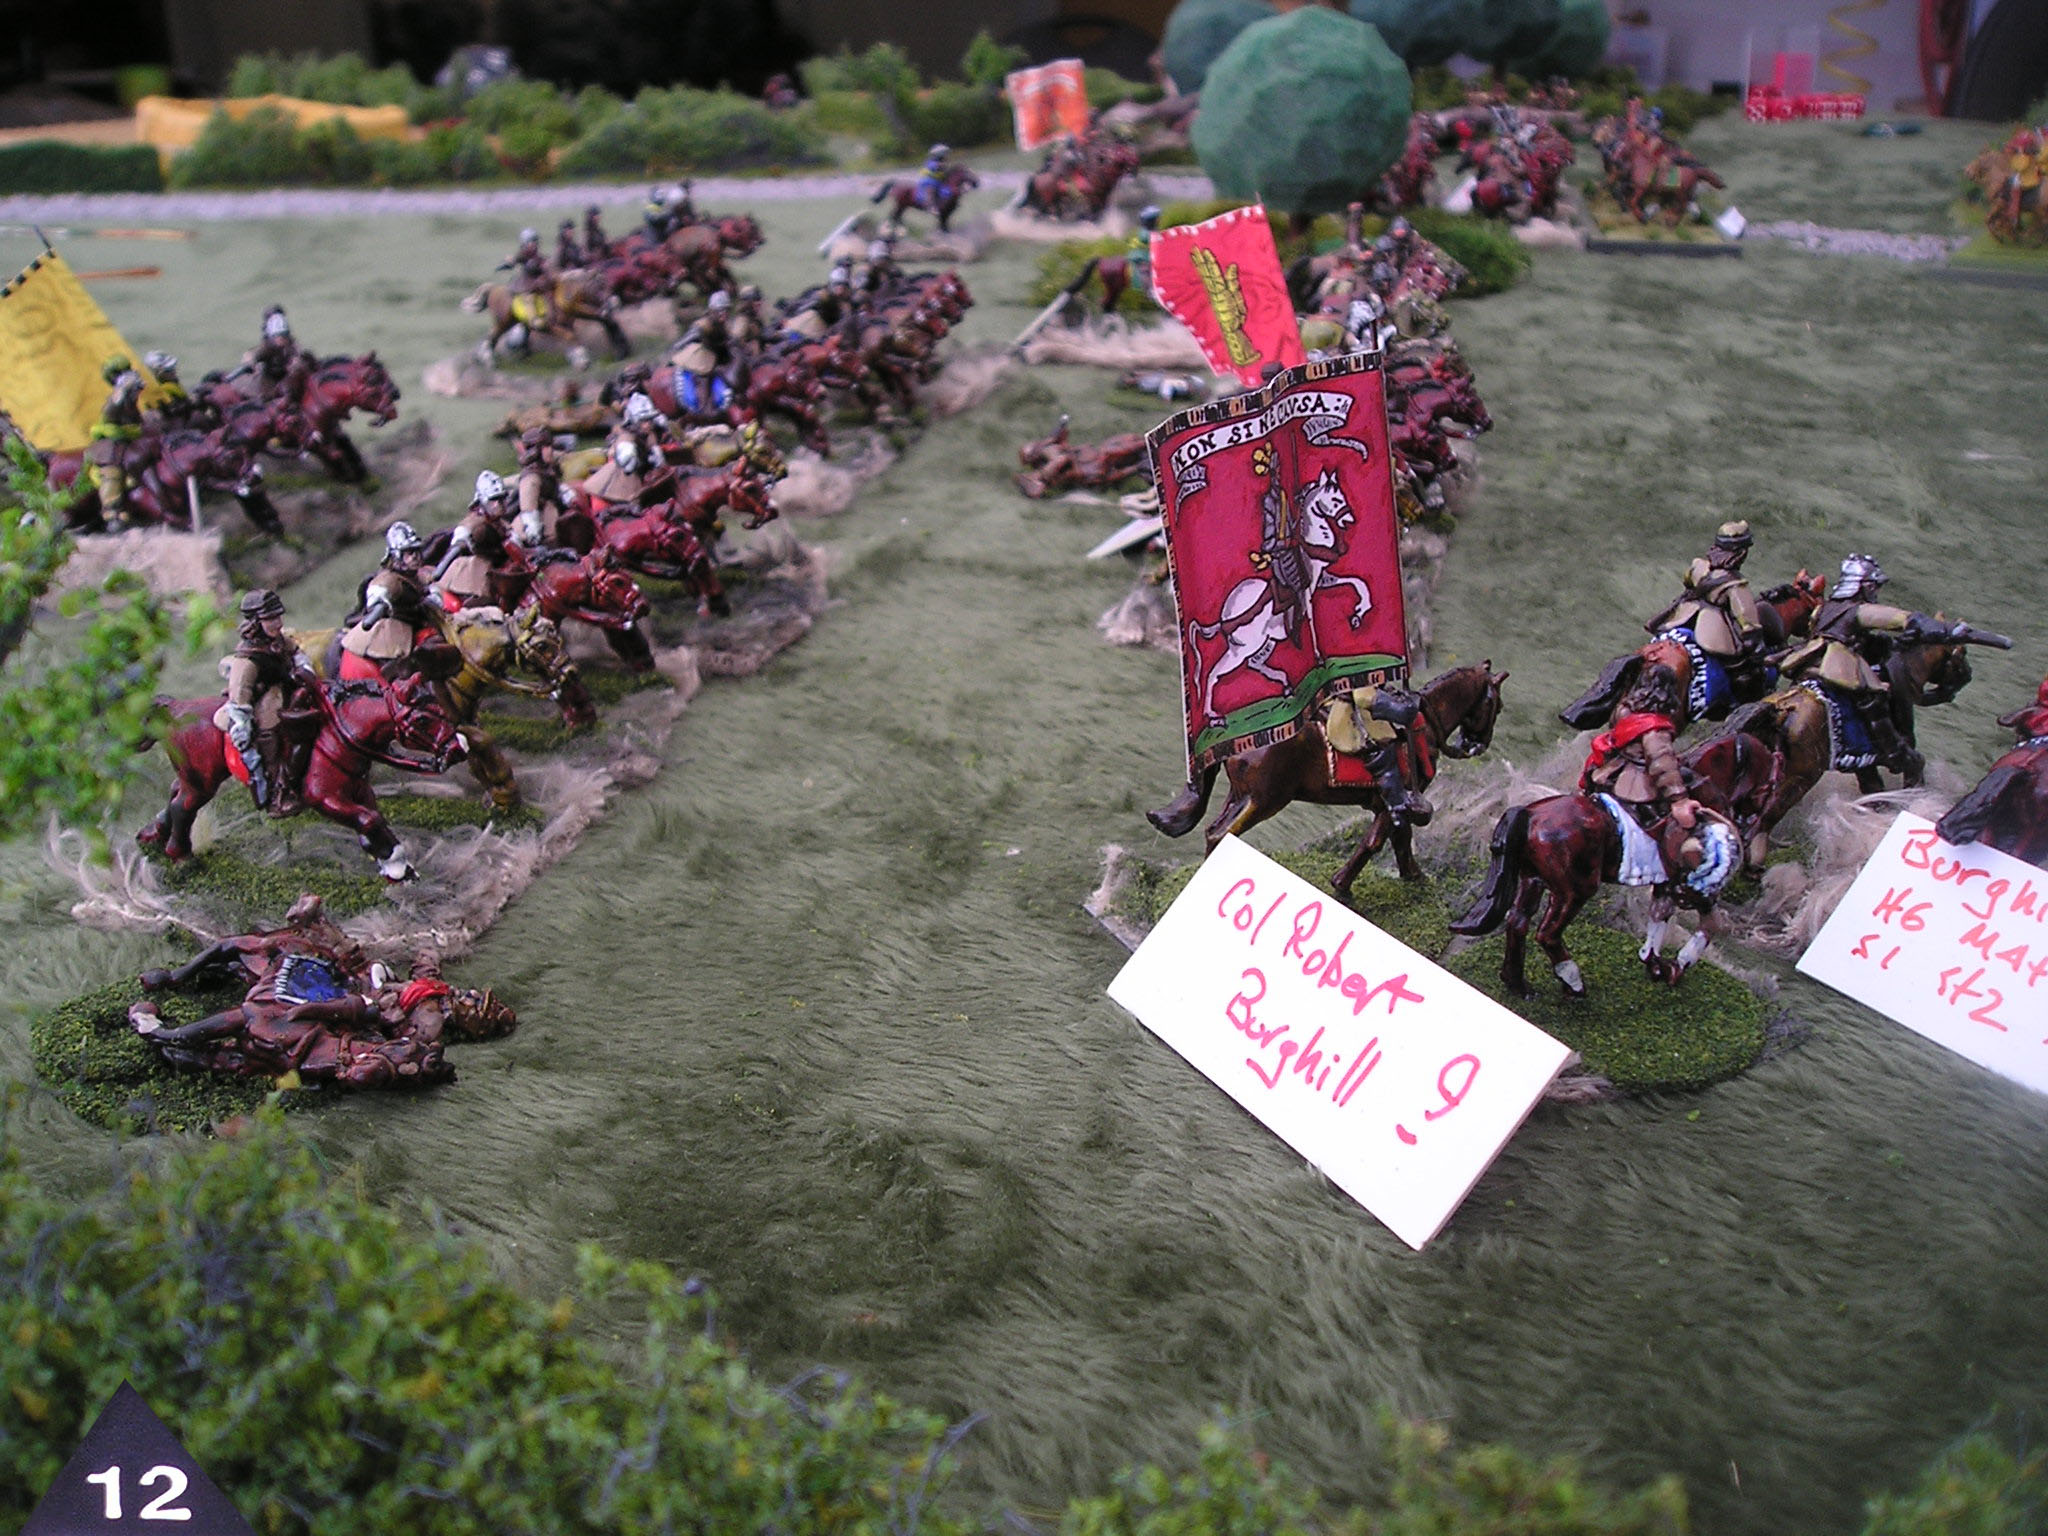
| the Parliamentary horse, under Colonel Burghill (command stand labelled with 9) chose to put forward a 'breakwater' |
 |
| the Parliament horse went all the way to the woods on the left |
 |
| then Dragoons took over in the woods |
 |
| that little copse of woods behind Royalist lines acting like a plinko deflecting deployment and reinforcements (later) |
 |
| Colonel Burghill's view |
 |
| Royalist reinforcments to arrive at this point on the map (much delayed in time) |
 |
| field overview start of turn 3 |
Rob was just not having any dice luck with the Royalist reinforcements, having rolled a 5 and 6 when needing a 2 or 3 or lower each time respectively.
 |
| whereas my dice luck suddenly was running HOT! I needed to roll a 3 or less (did not roll on turn 2 - we forgot) this was the result! |
 |
| in combat, there was a terrible result for the Royalist horse, fleeing from the table! |
 |
| while the Parliament were able to push forward the new arrivals to plug the 'breakwater' with a fresh elite & steady horse |
 |
| the horse clashed again |
 |
| driven back again |
 |
| the Royalist commanded shot kept up a steady fire, while the first horse squadron fled the field (seen in the distance at top of image) |
 |
| table level view of action |
 |
| the Colonel was busy rallying a badly damaged first 'breakwater' |
 |
| most of turn 4 was spent in rally and maneuver for both sides though the dragoons continued to trade shots |
 |
| the sun was coming out more from under the tent as turn 5 got started ... clearly the Royalists would get their foot troops soon |
 |
| Parliament's 'breakwater' was still in place though taking a beating |
 |
| the 'lesser horse' just held its ground under fire from the commanded shot |
 |
| the hedges where the Parliament dragoons started on the left (west) |
 |
| now all those dragoons were in action in the woods |
 |
| trading fire with some more Royalist commanded shot |
 |
| on the east flank, the Royalist dragoons failed in a break test ... fleeing the field This would leave the whole east flank in the control of Waller's Dragoons! |
 |
| start of turn 6 the open east flank seen at bottom of image |
 |
| firing in the center continued apace ... |
 |
| now in turn 7 both flanks were enveloped by Parliament and there were two lines of horse through the center |
 |
| Trevanion arrives with his pike & shot (at last!) |
 |
| east flank controlled by Wallers dragoons |
 |
| west flank controlled by Waller's and Somerset dragoons |
 |
| the solid bulk of horse in the center |
 |
| field overview at start of turn 8 |
 |
| more Royalist horse arrives |
 |
| just in the nick of time, as the front line for the Royalists was worn |
 |
| that little copse of woods now really becomes a thorn in the Royalists side |
 |
| better gallopers hit smaller trotters yet the trotters managed to make a few more saving throws and the break test (seen here 2x '1's) for Royalist horse went horribly wrong |
 |
| the Royalist horsemen just could not keep a flank steady |
 |
| an attempted charge on the east dragoons failed (the horse to the left of the image) and the shot continued firing indeed these commanded shot were easily the best of the day for the Royalists |
 |
| more horse moved up squeezing past that little copse ... |
 |
| on the road ... the Royalist lines were thin again |
 |
| the scene at the start of turn 9 hemmed in on all sides, the Royalists now must break one flank or the center or face a retreat under fire ... |
 |
| the failed charge at the east dragoons is now vulnerable ... |
 |
| Captain Burry, a provisional officer, replacing Major Dowet, who was KIA at Stoke Lane |
 |
| great shot of the Waller's dragoons, still holding the west woods, now alone as the rookie/wavering Sommerset dragoons had fled |
 |
| Captain Burry's command, was quick to arrive then slow to take any other actions |
 |
| the Royalists did not get their arrivals quickly at all this made them hesitant to push forward |
 |
| while the dragoons in the east performed miracles of shooting causing many units to test or simply be disordered and unable to move |
 |
| the whole Royalist center now fit in one frame |
 |
| evenly matched shooting! The red dice are for the Royalists firing into the woods. The buff dice are the 'saving throws' of the Waller's dragoons. |
 |
| turn 10 view of the battlefield |
 |
| Parliament horse, holding its line |
 |
| Royalist horse, bowing back in the west |
 |
| badly damaged in the east |
 |
| and that maddening little copse of woods makes doing anything about the Wallers' dragoons in the east hedges impossible! |
 |
| Trevanion's in the center, now needed to plug the hole |
 |
| while Capt Burry still only managed to do a rally no other troops moving |
 |
| Waller's Dragoons view from the east side of the field ... |
 |
| field overview at start of turn 11 |
 |
| Capt Burry still not doing much |
 |
| Parliamentary 'breakwater' holding |
 |
| now the Royalists must get a unit to break or they face collapse |
 |
| at least the west hedges were holding their own although it took having the army commander coming over to rally at one point ... |
 |
| field at start of turn 12 |
 |
| now Colonel Burghill was moving forward |
 |
| Waller's dragoons in the east had managed to break up another charge attack that could not 'flank' because of a little copse of woods ... |
 |
| in the west ... stalemate continued |
 |
| while another Royalist charge was stopped ... only just! |
 |
| the field on turn 13, where we called off the action the Royalists had two of three formations that were broken they would retreat Captain Burry was the only command with strength to pursue and his command roll failed. Therefore no further pursuit. |
 |
| Exhausted yet triumphant all of Burghill's horse were wounded |
 |
| Waller's dragoons in the west were disordered from the many volleys coming from the Royalist commanded shot |
 |
| at least this flank for the Royalists held |
 |
| no more advance was possible as the newly arrived formation of horse was now also broken |
The Royalists would retire from this field. This makes a total of five times the Parliament has won in this series of battles from the war in the west country.
Each victory has come with unexpected ways and losses along the way.
Rob, over at Codsticker's Historicals, has also post an account of this battle.


.JPG)


5 comments:
A hard fought action! And you had a back up plan for the power cut. [Metaphorical bow with a flourish of a broad brimmed hat]
I do like your tabletop set up and it is an absolute joy looking through the photos with the figures in action.
Thank you gents!
Sometimes I wonder if my little blogging activity is reaching anyone, then I read that Peter had a joyful reaction.
Makes me want to keep at it all.
Some wonderful photos Murdock; I especially like the table level ones. I should remember to bring my little tripod.
You did a great job in this game of managing your small units of horse; by cycling them through you could keep wounded or Shaken units from taking Break Tests- my shot always had fresh targets!
Well Cod, I do like to keep the shooting gallery well stocked.
Post a Comment